Article
How to Bind a Policy on the Broker Platform
Learn about our online bind capability and how to get policies issued faster than ever.

At-Bay’s Broker Platform is the fastest way to quote and bind Cyber, Tech E&O, or MPL policies.
Once you’ve gone through the quoting process, binding online with us is an e-commerce-like experience that lets you review your quote and complete the transaction all in one place. Simply review the premiums, fees, and contingencies, adjust the policy period, and choose your continuity dates.
You can bind any primary submission on the Broker Platform, even if it was originally submitted by email or At-Bay’s API.
And if you have a security contingency, you can “request to bind” any submission online with security and red flags. Just upload a document or email chain confirming the contingency has been met.
Here’s how to bind a policy on At-Bay’s Broker Platform.
1. Select an option and review coverages
Make sure to double-check the coverages, endorsements, and sublimits. Click on the arrow to review the Coverage Details and Documents for each option.
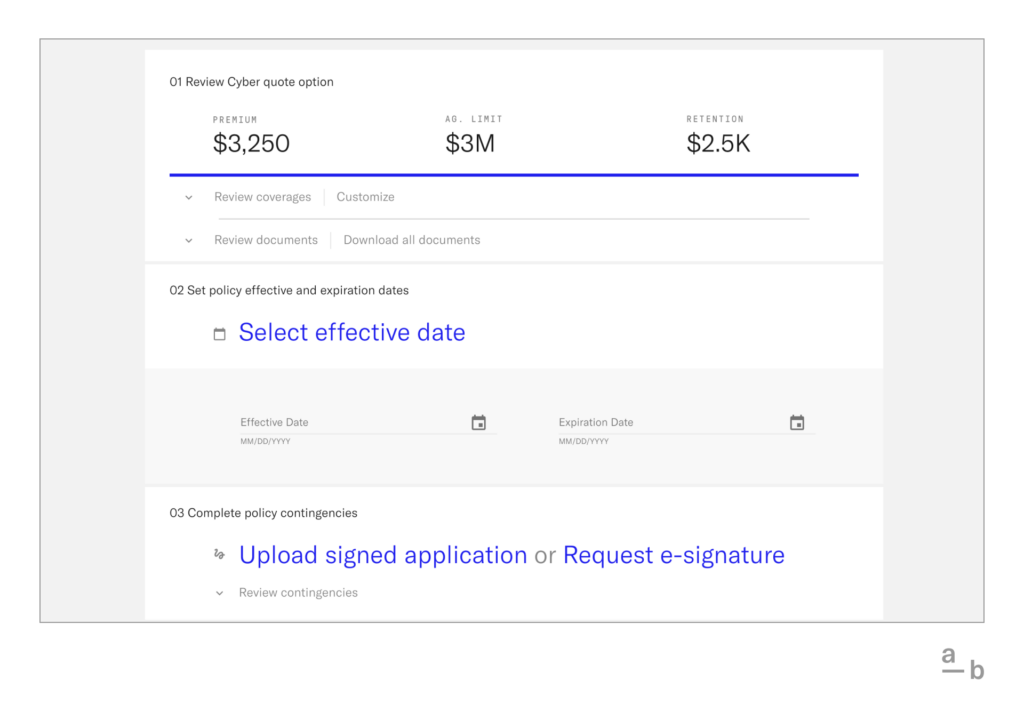
If needed, you can download the documents individually or as a packet. You can also easily customize your quote.
2. Select effective dates
Select the effective and expiration dates for the policy using the calendar widgets.
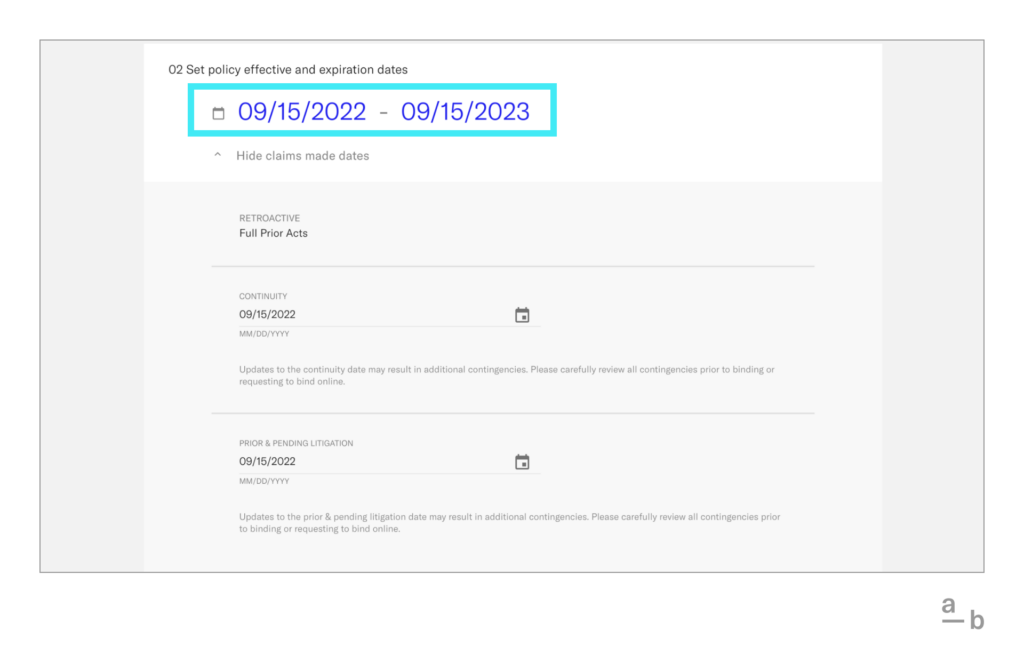
You can also customize a policy period for any amount of time between 6 and 18 months. We’ll simply prorate the premium based on the annual policy quote.
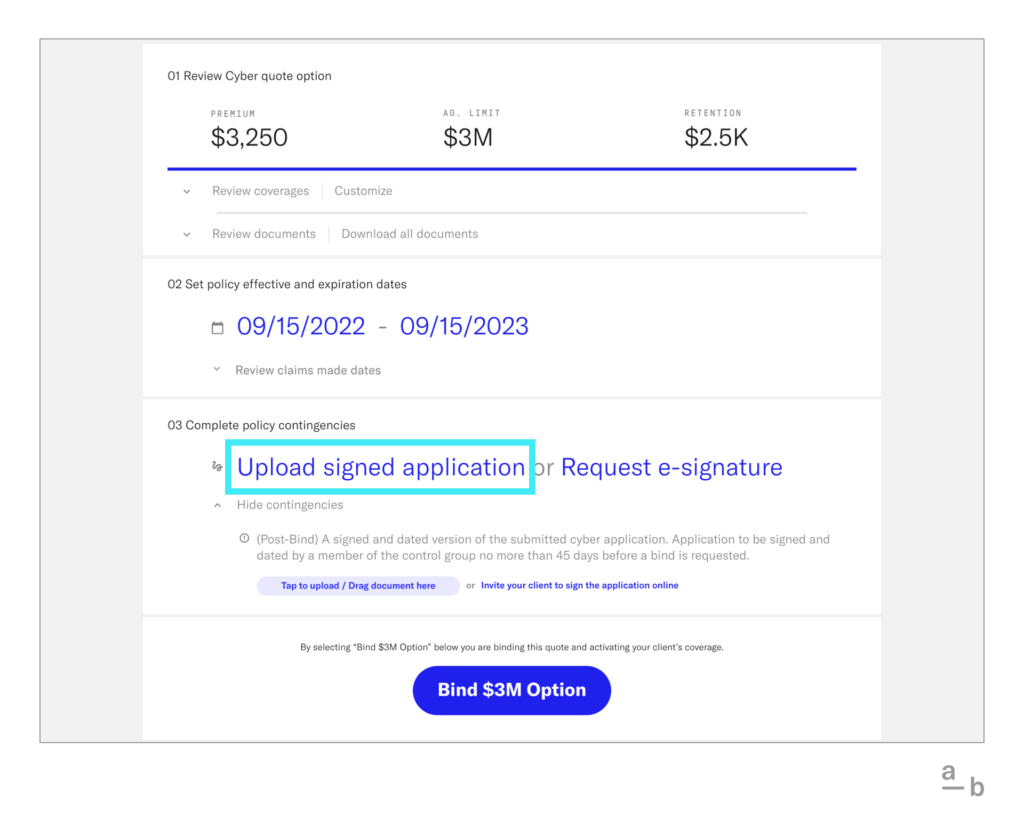
3. Review your contingencies
Check to see which contingencies are in place. If there are only post-bind contingencies, you can get a conditional binder immediately.
The Bind button will turn blue and activate right after you select the effective dates in this case.
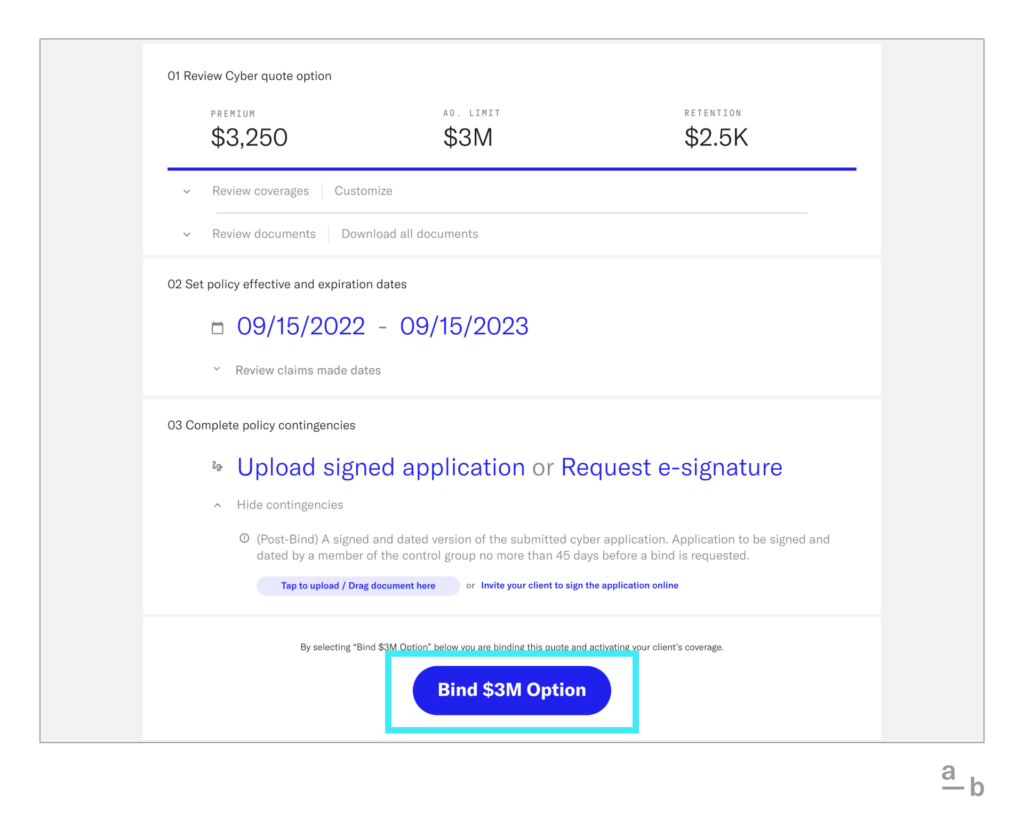
If there are any pre-bind contingencies, such as security red flags or previous claim information, an underwriter will need to review the bind request first.
If all contingencies are satisfied, the policy will be automatically issued upon clicking Bind.
4a. Upload a signed application
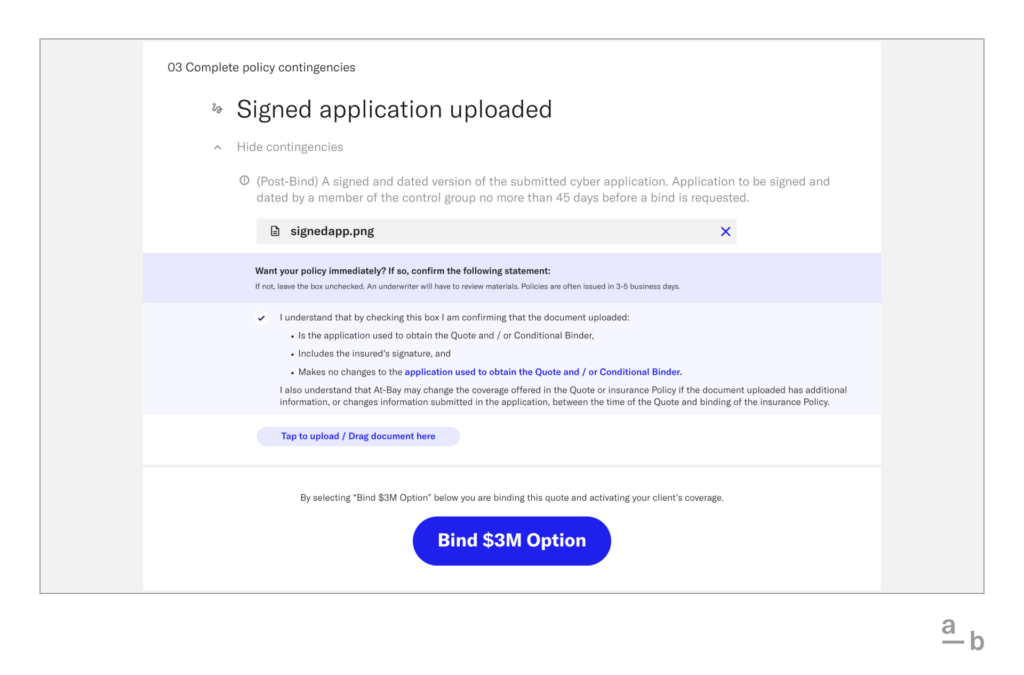
[Method 1] There are two methods to complete policy contingencies: request an e-signature or upload a signed application. To upload a signed application, simply click the button and upload the application. The file type must be a pdf, jpeg, jpg or a png.
Once the application is uploaded, finalize the attestation and then click the Bind button.
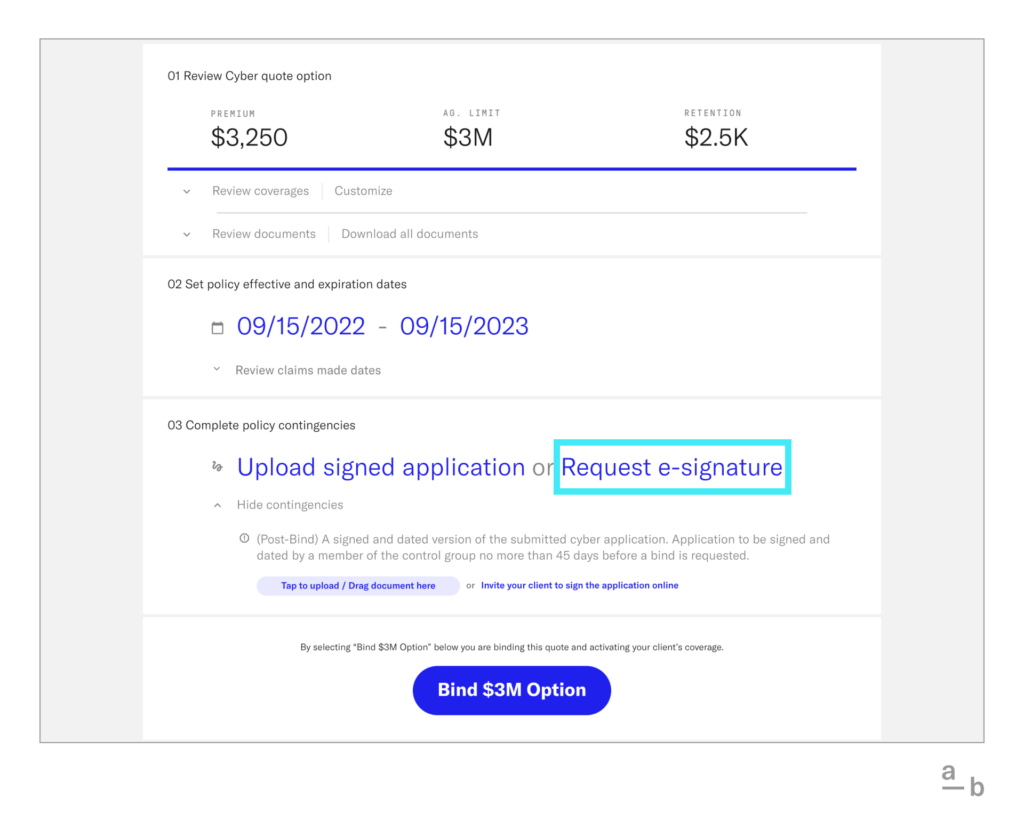
4b. Request an e-signature
[Method 2] If you’d like to request an e-signature, we offer them via HelloSign to make this process as seamless as possible.
Click the blue text that reads “Request client e-signature”. A unique link for the signature is generated for the broker to share and assign to their retail broker.
The retailer can easily use this same link to reassign the signature for the insured to sign.
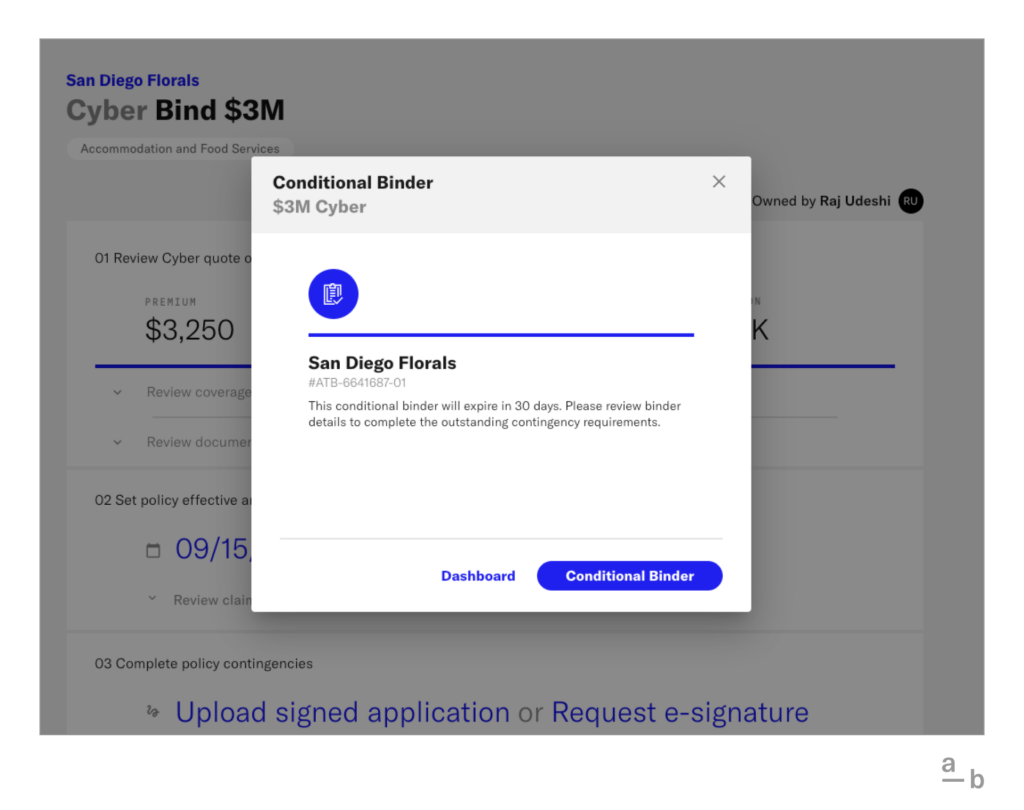
5. Satisfying contingencies
If there are no pre-bind contingencies, you will have the option to receive a conditional binder. You will not need to upload any additional docs yet. An underwriter on our team will be notified to review the related documents. If satisfactory, they will then approve the conditional binder and issue the policy.
If there are post-bind contingencies, you will need to provide a signed application and request to bind the policy.
6. Get the policy or conditional binder
Once you click Bind or Request to bind, the policy documents (binder, post-bind contingencies, and billing statement including commission breakdown) will appear immediately in your broker platform account.
These documents will also be emailed to you for quick and easy access, and to share with your retailer or client.
Ready to get started? Visit the Broker Platform to quote and bind today!